
Free Postage on all orders. Labours Day Holiday from 1st to 4th.May. 12% off discount code: labour

Gel Blaster & Airsoft V2 Gearbox Shimming AOE Correction Guide2021-10-18
Adjusting the gearbox is one of the necessary skills for gel blasters or airsoft players. As long as gearbox shell or gears are changed, the shims must be re-adjusted. Although the original gearbox can be used, it is not guaranteed to last for a long time. The original factory made gearbox is with a large type of shims. Because of the manufaturing issue, in fact, every gearbox and gears are not exactly the same, especially the No.2 gearbox, which is a separate motor structure.
It is necessary to re-adjust the height of the motor if a grip, motor, or shell are changed. Learning to adjust the gearbox is tantamount to a better understanding of the wave box. Maybe you can only purchase parts and assemble them into a brand new gearbox in the future.
Warning: The time required for shimming ranges from 20 minutes to 1 hour. For your personal health, it is not recommended to perform any related work after 12:00 in the evening.
Required materials:
The gearbox, all possible tools, non-conductive bearings/gears/airtight lubricants, various specifications of gear gaskets.

The LDX mosfet version gearbox, which has been sitting idle since I bought it, is the gearbox that will be used for the demonstration tutorial.

LDX is a split structure, which is more convenient for disassembly, maintenance, and shimming.

For the standard v2 gearbox, the shimming process of standard version.2 gearbox is relatively a bit complicated, but the method is exactly the same.
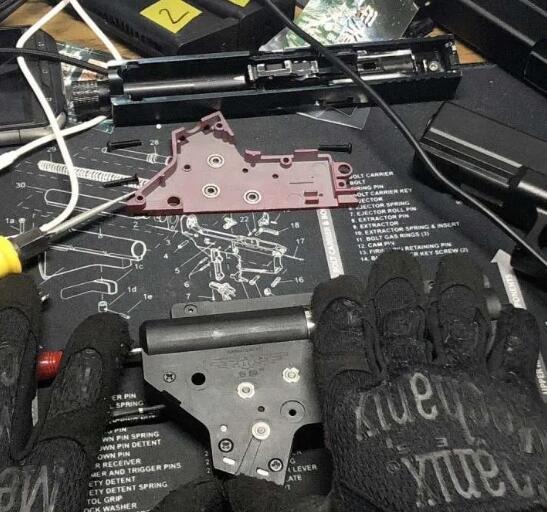
Get to the point, to disassemble the gearbox, you need to unscrew all the screws, place them neatly, remember the original position of each screw, and slowly pry open the shell from the motor side, paying attention to the anti-reverse gear that may pop up.

Confirm whether the shell has a shim stuck to the bearing as soon as possible, remove it carefully, and keep the shim and anti-reverse gear properly.

There are differences in the disassembly and assembly methods of the standard v2 gearbox. You need to hold the cylinder in one hand, and use a screwdriver to reach into the spring retainer with the other hand to fix the spring (except for qd spring retainer), and pry it open from the motor hole.
Except for mosfet, everything in the gearbox must be taken out and the lubricating oil on the surface of the gear and the inner side of the shell must be wiped dry.
Shimming
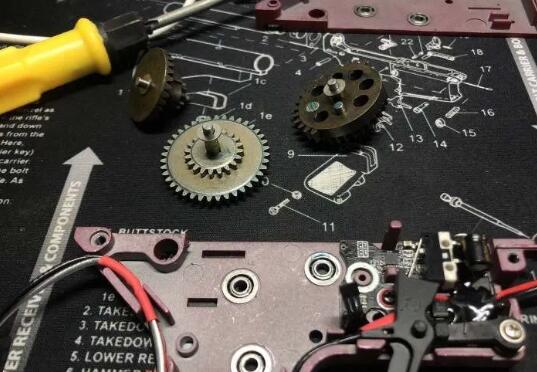
The gearbox is divided into left and right halves. It should be noted that most of the gearbox shimming process will start from the left half side. It is recommended to adjust from the middle gear, because this gear determines the height limit of the other two gears.
First put a 0.1mm shim on the left to raise it up. It is advisable to connect the bevel gear bearings that cannot be rubbed against the shell. If it is not high enough, continue to add 0.1mm, which is a very simple step.

Then you can add a shim to the other side, how to add it? Starting from 0.2-0.3mm. Under normal circumstances, except for bevel gear, the shims on the right are thicker than those on the left, so you can add them without worry. However, it should be noted that the number of shims stacked on each side cannot exceed 3 pieces. It is best not to stack only one piece (unless there is only one piece of 0.1mm), you can use two pieces of 0.1 instead of one piece of 0.2. If the diameter of the shims you have is different, in principle, the larger one is outside and the smaller one is placed inside.

After stacking the shims, close and hold the gearbox shell, and use tools to push the gear shaft from both sides. If there is a large range of activity, continue to increase the shims on the right side, and if not, reduce the shims.

If you think it's almost done, just screw on all the shell screws. Don't feel it's troublesome. After the shell is tightened, there will be 0.1-0.2mm deformation that is imperceptible to the naked eye. Sometimes if the movable gap of the gear will disappear after the screw is tightened, and the rotation accompanied by very large friction, then need to reduce the thickness of the shim.
It's ideal to retain 0.1mm movable space of the gears, and it is not impossible to control it below 0.1mm, but >0.1mm usually causes slightly greater friction, such as when the gear feels more resistant and can only be rotated by 1-3 rounds, then need to reduce the thickness of the shim by 0.1mm.

If the movable space of the gear is adjusted to the best, and the rotation is smooth, then it means the middle gear is adjusted well, take it out and put it aside temporarily.
BTW, don't forget to apply a little grease to the gear shaft and shim, so that the shim will stick to the gear and will not be easily lost. (Do not oil up in advance in other places)
The next one is the bevel gear. Unlike the other two, the bevel gear should be adjusted from the gearbox on the right half, and the habitual gasket is 0.1-0.2.

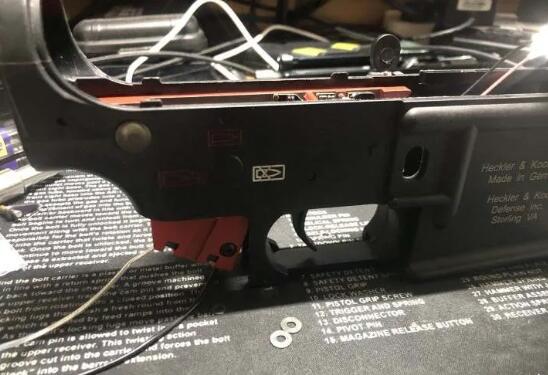
Install the grip with motor into this half of the gearbox, and if possible, screw on the screws.

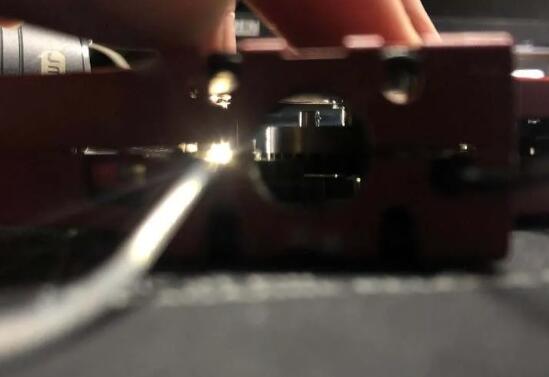
Adjust the screws on the bottom cover of the grip so that the motor gear and bevel teeth achieve the best occlusal surface. You can refer to the figure below. It should not be too low or too high.

After adjusting the position, the bottom cover screw does not need to be moved anymore. In order to prevent loosening that may occur after long-term use, it is recommended to take measures (such as screw glue) for reinforcement.
There is an observation hole in the bevel position of LDX. If you don't have it on your gearbox, you can consider cutting one yourself.
Next, close the gearbox, install the grip and motor, and toggle with a tool. The bevel gear should be able to rotate slightly. This is because there is a gap with the motor gear. What we have to do now is to gradually thicken the shim on the right to reduce this gap as much as possible. This gap can be confirmed by observing the rotation amplitude of the bevel gear. It should be noted that there is a certain risk of eliminating the gap between the bevel gear and the motor gear. I personally recommend leaving a little bit. There is an angle problem with the half gearbox shell. In the end, the gearbox still needs to be tightened to confirm. (The operation of bevel gear shimming may be very cumbersome for the first time. . . )

After controlling the amplitude of movement, you can add a shim to the other side (left). The operation is the same as the previous large gear, controlling the movable space of about 0.1mm.
Because of the adaptation of the grip, gearbox, and receiver, the angle and depth of the grip connection after the gearbox is loaded into the receiver may not be the same as when the gearbox is directly installed.
Personally, it is recommended to do an inspection after put into the receiver. If the rotation amplitude of the bevel gear has not changed, that is very good. If it becomes larger, it proves that the motor height is low (the grip does not fully fit the gearbox), and the bottom cover screw of the grip needs to be adjusted.
The Split gearbox can directly move the bevel gear, and the standard gearbox can also be moved with a finger.

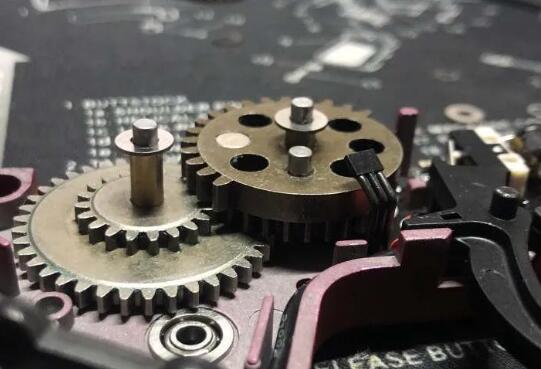
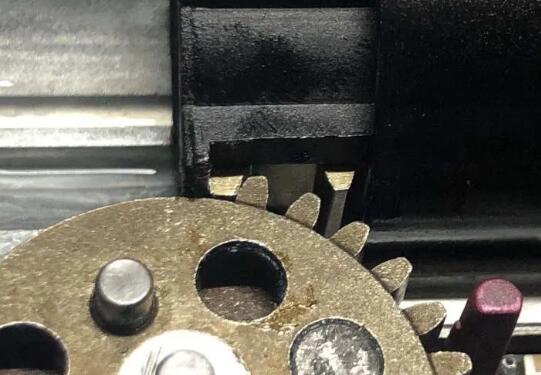
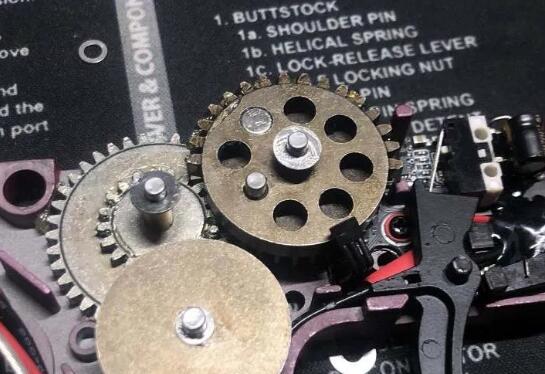
After no problem, remove it, install the middle gear and bevel gear at the same time, and observe the occlusal area of the two gears.

The ideal occlusal area between the gears is about 70-90%. The gears in the figure is obviously not enough, and the middle gear shim needs to be interchanged or re-adjusted left and right.
After adjusting, take away the bevel teeth. The last thing to adjust is the tappet gear. Put the large gear on it. By adjusting the thickness of the shim on the left to increase the occlusal surface with the middle teeth as much as possible, you can try to put a thicker shim at the beginning. Be careful that the large gear cannot cause friction with the middle gear.
My inspection method here is that as long as the gap between the two gears is translucent, it will be fine. If the gears are greased in advance, it may not be visible. Close the shell and apply pressure to the large gear in the direction of the middle teeth. If the light cannot pass through, the spacing is too small and friction may occur.
After confirming the spacing, the process on the other side will be the same as the other gears. At the same time, don't forget to tighten all the screws to test the range of gear movement.
In this way, the last gear is shimmed.

Do not install the anti-reverse gear, screw on all the screws, and then toggle the tappet gear vigorously. The gear set can be rotated more than 3 times together. If there is no friction and abnormal noise, it is qualified, otherwise re-check the gap.
Angle of Engagement (AOE)/ Gear Surface Engagement Angle
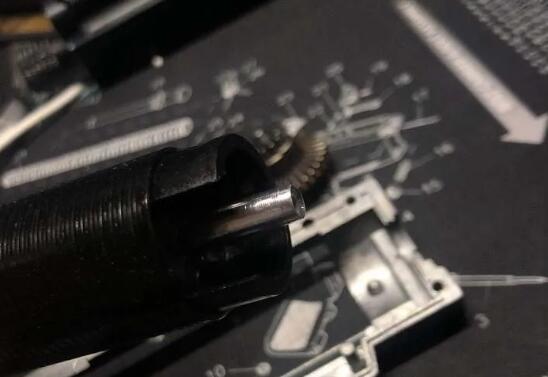
Put in the cylinder and ladder, completely compress the ladder, and turn the large gear until it comes into contact with the first tooth of the ladder.

You may find that the contact surface between the large gear and the first tooth of the ladder is not parallel. AOE has minimal impact on the performance of the gearbox, but it will accelerate the wear of the plastic tooth ladder, but it will not cause much impact when metal teeth ladders are popular today, so it is not necessary, but if you have resources on hand, it is recommended to do AEO correction.
This is the AOE in the ideal state after correction. It should be noted that the adjustment of the AOE is to ensure that the tooth surface contacts are parallel, and it is a wrong understanding that the tappet gear need to be placed at a certain angle.

There are two ways to correct the AOE. One way is to fix some harder rubber materials on the patter head or cylinder head. The other way is to replace with the thicker head and cylinder head. The latter is equivalent to try a luck. . .
The next step is the focus. Correcting the AOE will change the initial position of the ladder, and the backward movement distance will vary from one to two teeth. If a 15-tooth ladder is used, the second tooth of the ladder will contact the large gear after each rotation of the large gear. Although the 14 teeth ladder on the market does not have a second tooth, the large gear may still be swept to the third tooth of the ladder.

Be sure to straighten the ladder for simulation before starting to figure out whether there is friction between the big gear and the third tooth. If there is, cut the third tooth depending on the specific situation. Sometimes you need to cut it in half, and sometimes you only need to cut 3/1. It is enough, if you meet extreme situation that will reach the fourth tooth. . . You have to cut it or replace it. This kind of ladder generally does not have a long life span. . .
If the ladder is no problem, you can start to pad the material. The thickness is a bit larger than the simulated one, because the next thing to do is to press the spring and the retainer into the gearbox shell. After the spring is completely compressed, the position of the ladder in the gearbox now is the actual position. Springs of different strengths will affect the angle of engagement.
After confirming the thickness of the material, it can be fixed. Don't forget to avoid the hole position when fixing it on the head. If it is a cylinder head, you need to make a hole.
Maintenance/Grease
Wipe clean the dust and old lube from the inner wall of the cylinder, squeeze in a little airtight lubricant. Use a cotton swab, preferably a finger, and apply a circle on the inner wall of the cylinder, not too much.
The ladder also needs to be wiped clean, and a thin circle of airtight lube should be applied to the O-ring of the head, not too much.

Finally, put it in the cylinder and move it back and forth many times, and it will be fine.
The cylinder head also needs to be coated with a thin circle of airtight oil, not too much. It is mainly used for air tightness of the nozzle. If the nozzle is applied, the amount of grease is difficult to control.
The guide rail of the ladder is coated with lubricating oil. Here, the lubricating oil of plastic teeth is used. It can be smoothed inside and out with the help of the ladder. You can't leave it outside in a lump like this. . .

Finally, the surface of the tappet is also coated with a layer of grease, and the maintenance of the cylinder set is completed. If it is a split gearbox, it can be installed and tightened directly.
Then there are gears, which many players like to grease everywhere, even in areas where contact does not occur.
In fact, It's not the more gear oil, the better. Here, it only needs to be applied to the tooth surface and gear shaft. Applying it to other places will not only waste, but also increase resistance.
After greasing, close the shell (no need to twist it), twist it with your fingers more than ten times, and then open it to clean up the excess gear oil attached to the shell. At this time, all bearings can be greased. I can only use the D70 on my hand to spray a few times (bearings cannot use high-viscosity lubricants).

Finally, we have to do a test again. Put the three gears into the gearbox, tighten all the screws, and push the gear shaft again to confirm whether there are any gears that are stuck and have an excessive range of motion. If there are any, give priority to adjusting the ones that are stuck.
If it's okay, toggle the big gear hard and it should be able to rotate 5-15 times.
If there is huge resistance, check for gears with too small range of motion or possible friction.
if. . . No problem, that's perfect. The shell can be closed. Except for the cylinder parts and the anti reverse gear, all the others need to be installed and tighten the screws.

The split gearbox can be installed in half, so there is no need to screw too many screws. Install the motor and grip. If it is not Airsoft, make sure that the magazine contacts are separated before connecting the battery, otherwise the battery and mosfets will be burned.
After connecting the battery, test whether the semi-/fully automatic is abnormal, whether the mosfet is faulty, and whether the gear is idling with abnormal noise. If there is no problem, it can be removed.
Final Stage Test
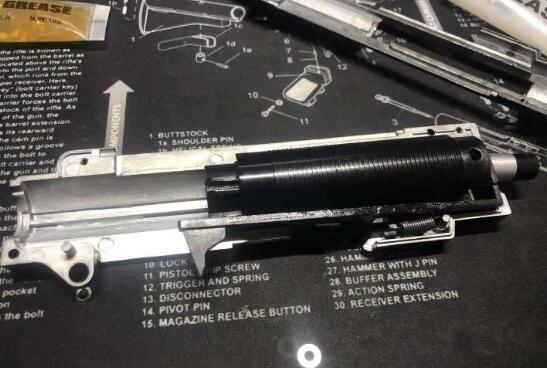
After this step, there is no need to screw the screws anymore. If there are novices who don't know how to assemble gearbox, please refer to the figure below.

There are several parts that need to be paid attention to, such as the tappet, trigger, and anti-reverse gear. Sometimes they may not be installed in place. Pay special attention to the anti reverse gear. If this part is installed incorrectly, the pull bridge will be broken, even the gears could be broken. If the anti-reverse gear jumps out, you can press them with a small screwdriver and close the gearbox carefully. If the gear hole position is not correct, pry it with a screwdriver. If it is a standard v2 gearbox, finally confirm whether the cylinder block is installed in place. If it can't be closed, you can try to push the nozzle a few times.
if. . . If the assembly fails, carefully remove the gearbox shell, make sure that the shims are not lost or fallen into the gearbox, organize it and try again.
Finally, load it into the receiver and test various functions. If no problem, then no problem. . .

OKay, that's all. If there are any errors or additional information, please contact me to correct them.
- Company Info
- About Us
- Contact Us
- Customer Reviews
- Blogs
- Brands
- YouTube Videos
- Coupon Upto
- Coupon Partner
- Coupon Seeker
- User Center
- FAQ
- Forget Password
- My Orders
- Tracking Order
- My Account
- Register
- Affiliate
- Company Policy
- Locations We Ship To
- Payment Methods
- Shipping Policy
- Refund Policy
- Privacy Policy
- Terms of Service
- Disclaimer
- Contact Us
Shanghai zhenduo electronic technology Co,.ltd
Address: 15 Changyi Road, Shanghai, China
USA address: 818, colorado Springs, the United States
Phone number: +86 021-315970888
Email address: qq463301085@gmail.com